
Introduction
Ever been in a situation where you've used Postman in the past or are currently using Postman to automate some test checklist, and you find yourself always manually changing data in your request payload (say you're using a register user endpoint)? Especially when you want to quickly do some sanity or smoke checks and need to give feedback quickly?
I've been there, and I tell you, it can be quite repetitive, boring, and as a result, takes some of the fun away from testing. It's like filling out the same form over and over again with different variations of your name and email.
Here I'm going to show you how I save time and have some fun using Postman to automate this little task that can be such a time-waster.
What You'll Get from this Tutorial
By the end of this tutorial, you'll be able to:
- Generate random data automatically for your API tests
- Stop wasting time manually changing request data
- Run your tests multiple times without data conflicts
- Make your testing process way more efficient and fun!
Before We Start
Note: You need to be familiar with basic JavaScript and chai assertion library. Nothing complicated, just enough to understand what's happening in the scripts.
Let's Begin
If you haven't already, download Postman and fire it up.
For this tutorial, we'll be using the Register User endpoint from a Todo List API as our example:
https://todo-app-go-jq45.onrender.com/swagger/index.html
Now open your Postman and let's get started.
Step 1: Import the API Request
Import this curl command into Postman:
curl -X 'POST' \
  'https://todo-app-go-jq45.onrender.com/auth/register' \
  -H 'accept: application/json' \
  -H 'Content-Type: application/json' \
  -d '{
  "email": "string",
  "fullName": "string",
  "password": "string"
}'
Take a look at the request payload - it has fields for email, fullName, and password. These are exactly the fields we want to generate random data for, so we don't have to keep changing them manually every time.
Step 2: Write Your Pre-request Script Magic
This is where the magic happens! Click on the "Pre-request Script" tab in your request.
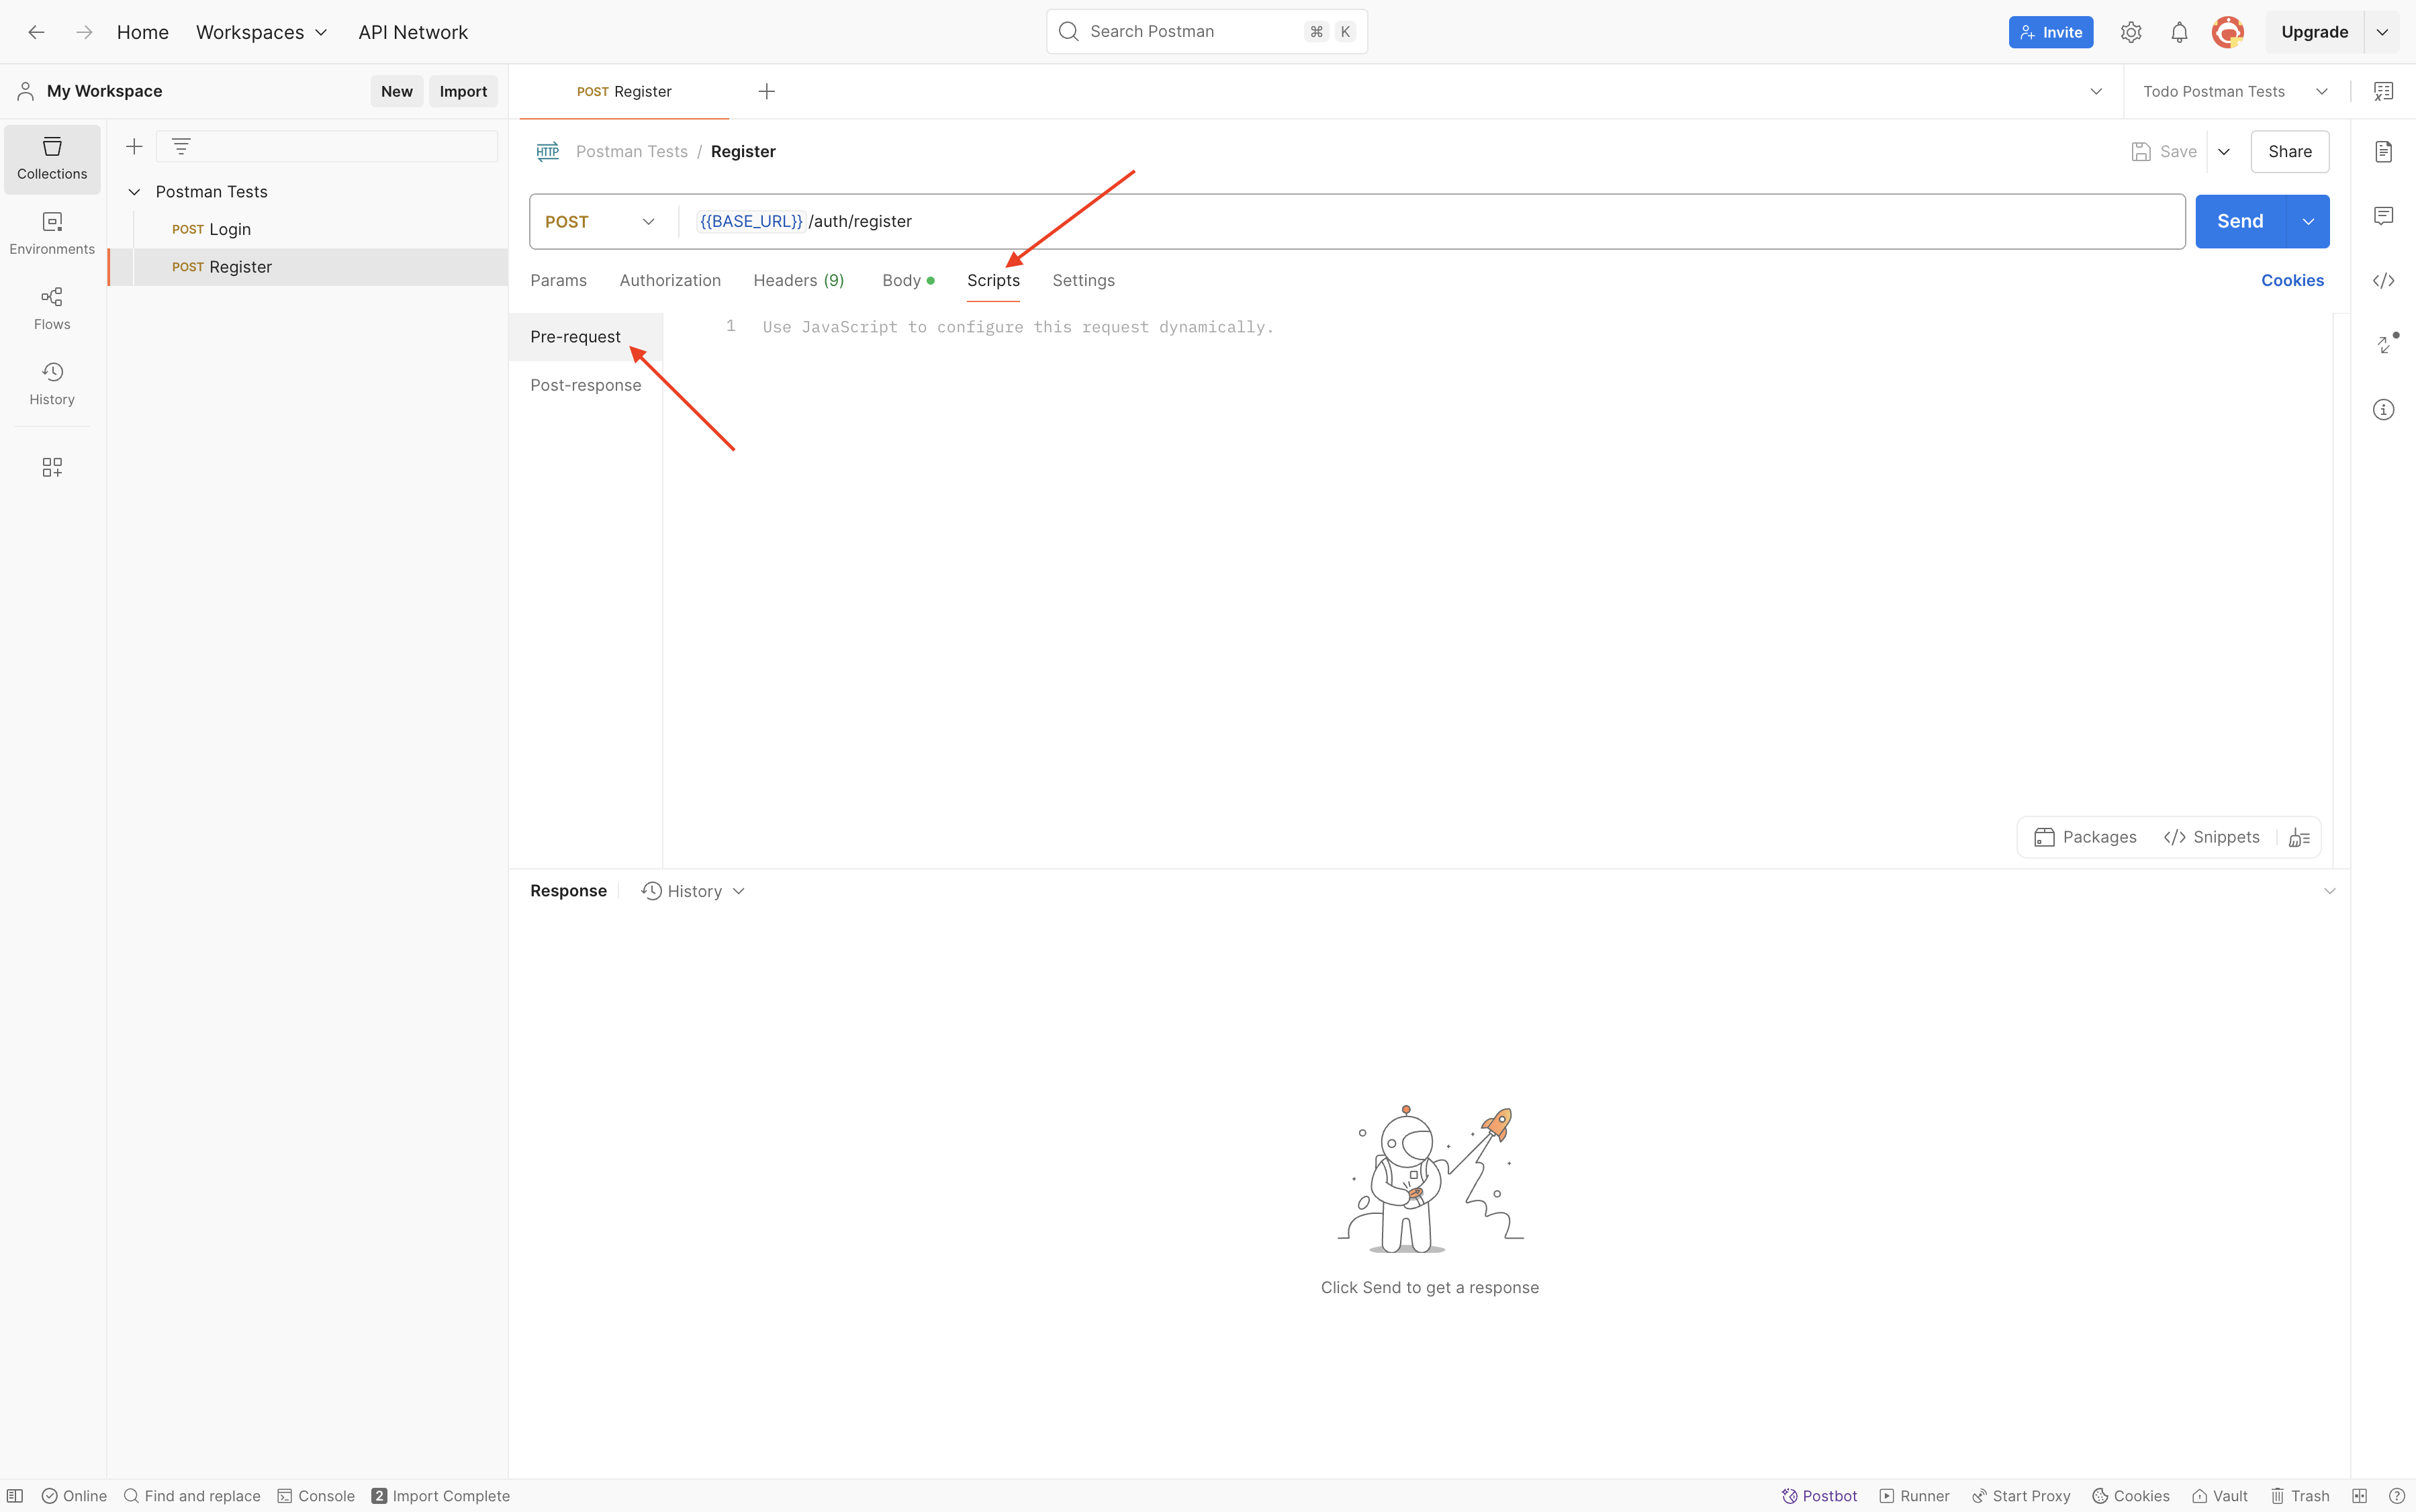 Navigate to the "Pre-request Script" tab (highlighted above) to add your custom JavaScript code that will generate random test data before each request is sent.
First, let's generate a random string using JavaScript's MAath random function:
const randomString = Math.random().toString(36).slice(2, 10);Now, let's create variables for email, password, and fullName based on our randomString:
const email = `user_${randomString}@gmail.com`;
const fullName = `User ${randomString.toUpperCase()}`;
const password = `Pass_${randomString}_123`;I like to confirm what's being generated, so I usually add some console logs:
// Let's see what we've created (check the Postman console after running)
console.log('Generated Email:', email);
console.log('Generated Full Name:', fullName);
console.log('Generated Password:', password);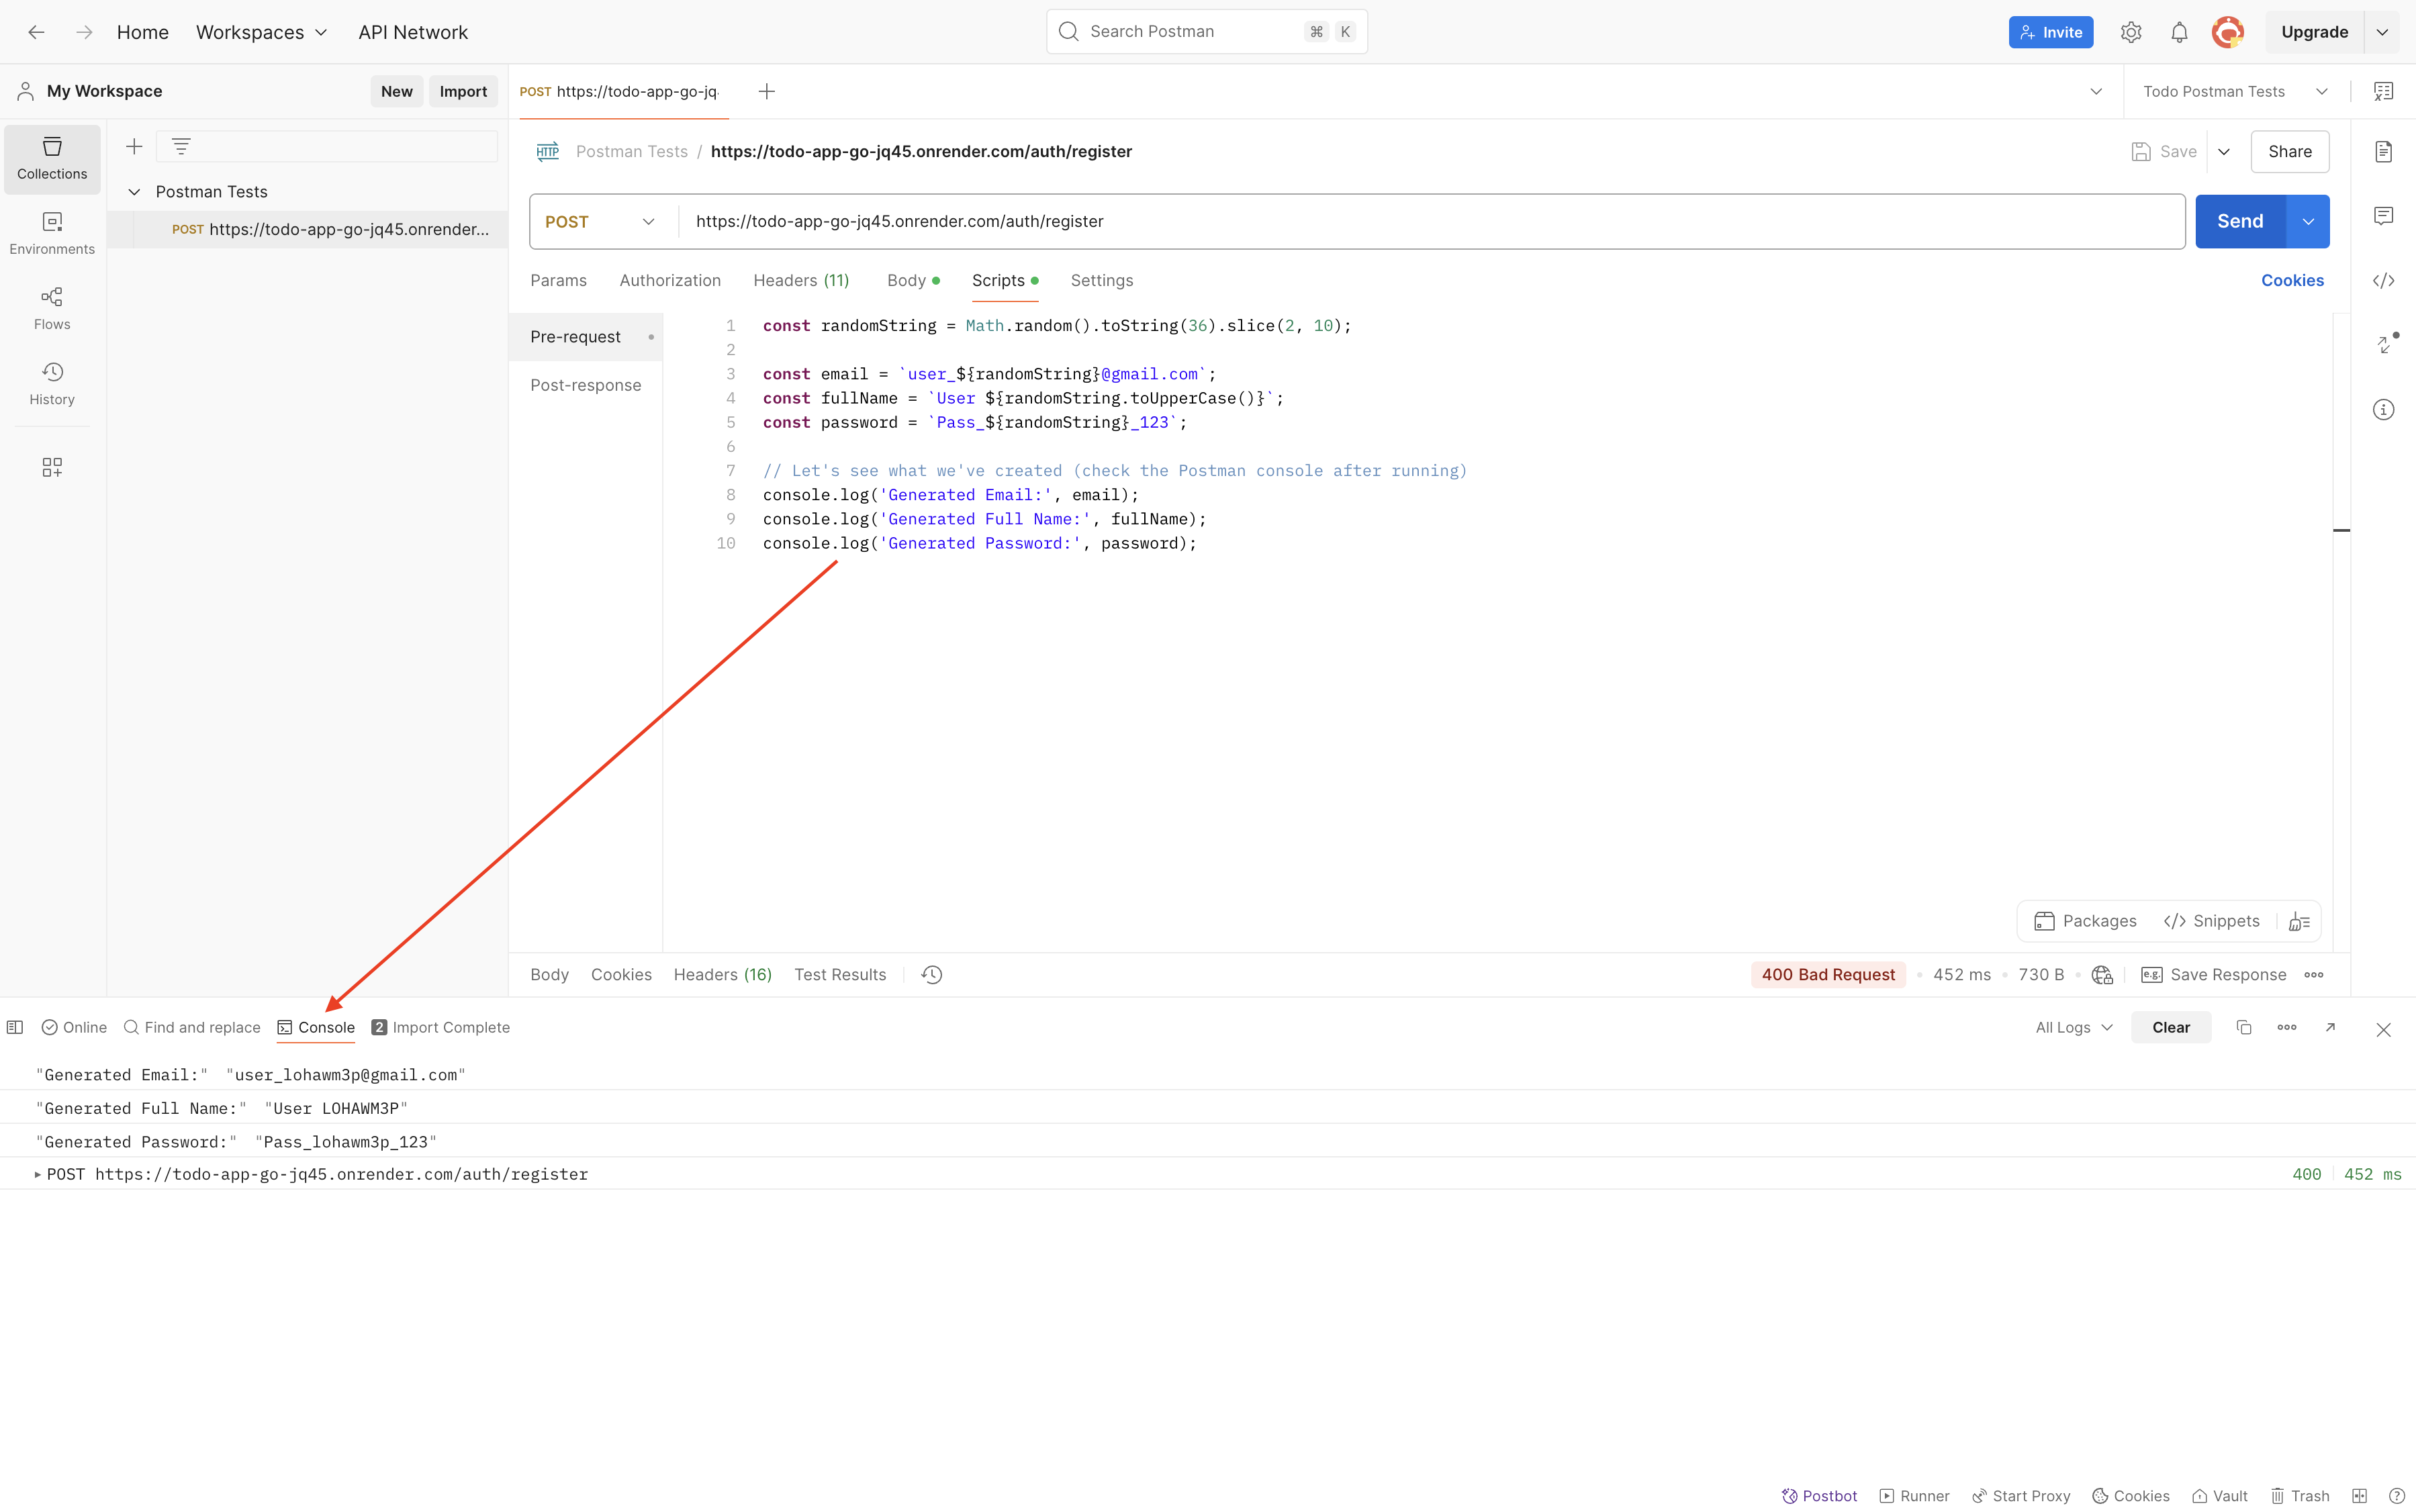 View your generated test data in the Postman Console (Ctrl+Alt+C). This debugging feature lets you verify the values being created before they're used in your request.
Now we need to save these generated values somewhere so our request can use them. Depending on your needs, you can save them as collection variables, environment variables, or global variables. I typically use collection or environment variables.
For collection variables (my preference), use:
pm.collectionVariables.set('randomEmail', email);
pm.collectionVariables.set('randomFullName', fullName);
pm.collectionVariables.set('randomPassword', password);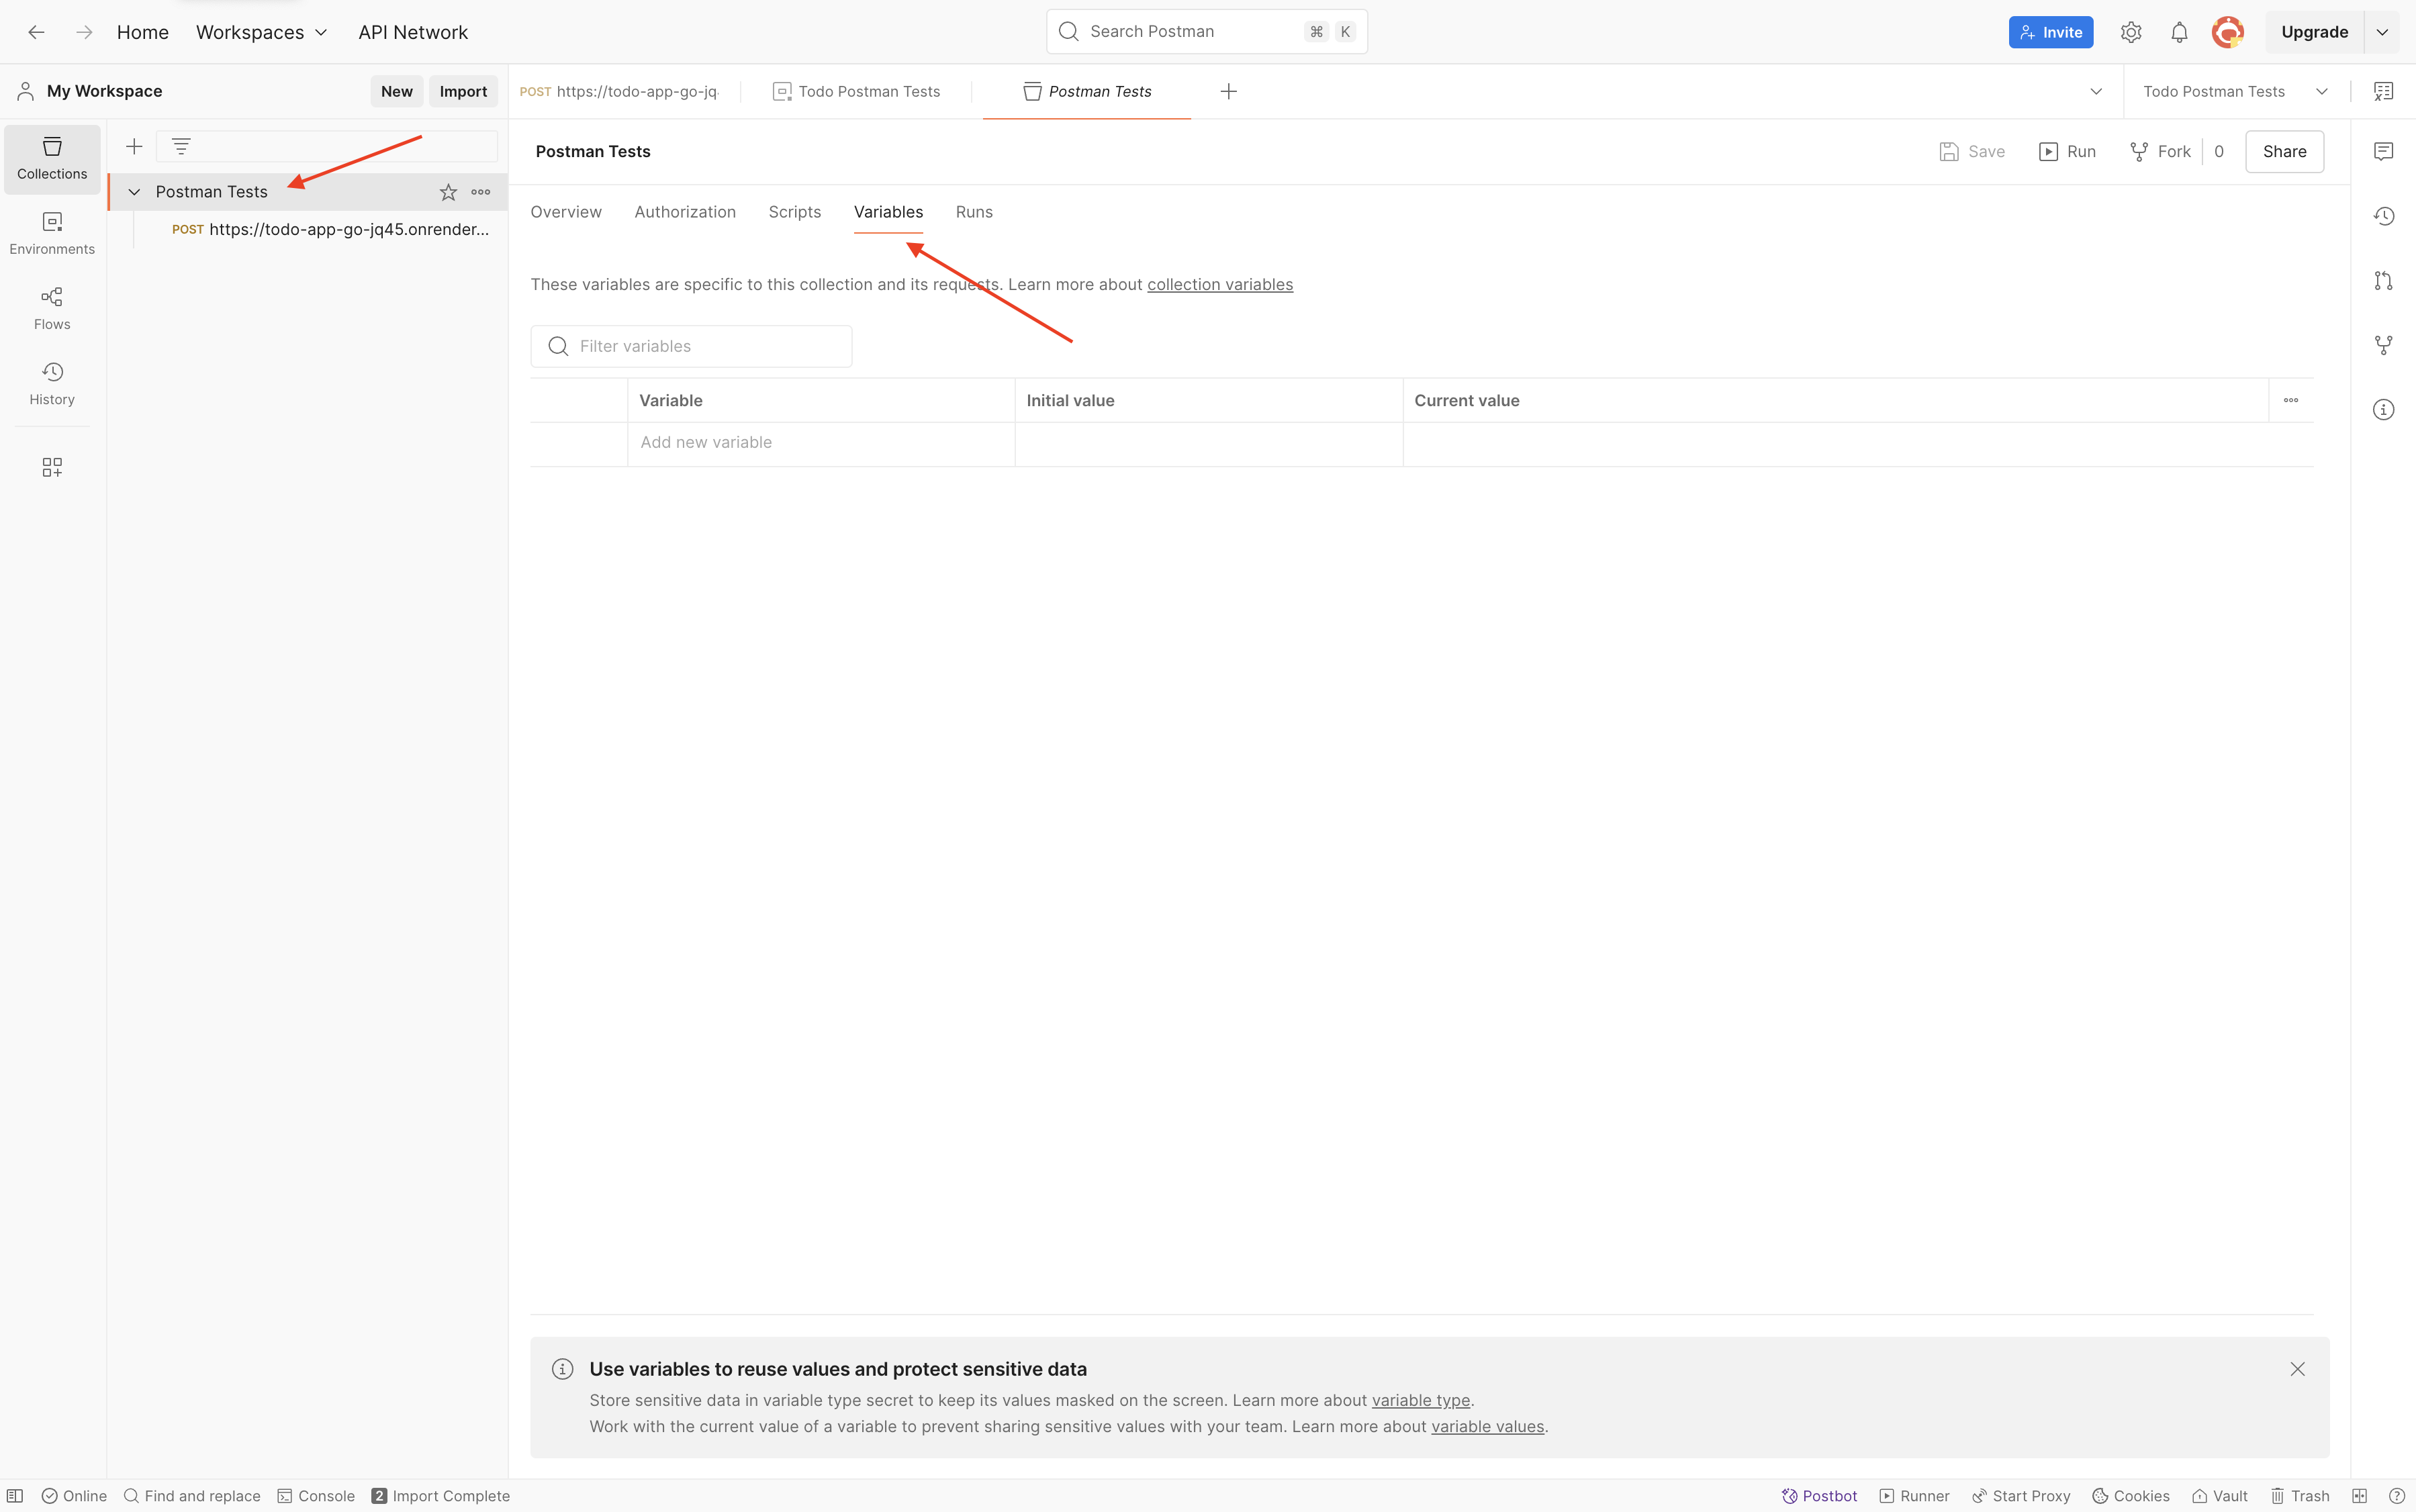 The Collection Variables section stores your generated values for reuse across multiple requests. Access this panel from the collection sidebar to inspect or manually edit your variables.
Alternatively, if you prefer environment variables, use:
pm.environment.set('randomEmail', email);
pm.environment.set('randomFullName', fullName);
pm.environment.set('randomPassword', password);Step 3: Update Your Request Body
Now for the final piece of the puzzle! Go to the "Body" tab of your request and replace the static values with our new variables:
From:
{
"email": "sample@gmail.com",
"password": "Password123",
"fullName": "Simple Username"
}To:
{
"email": "{{randomEmail}}",
"password": "{{randomPassword}}",
"fullName": "{{randomFullName}}"
}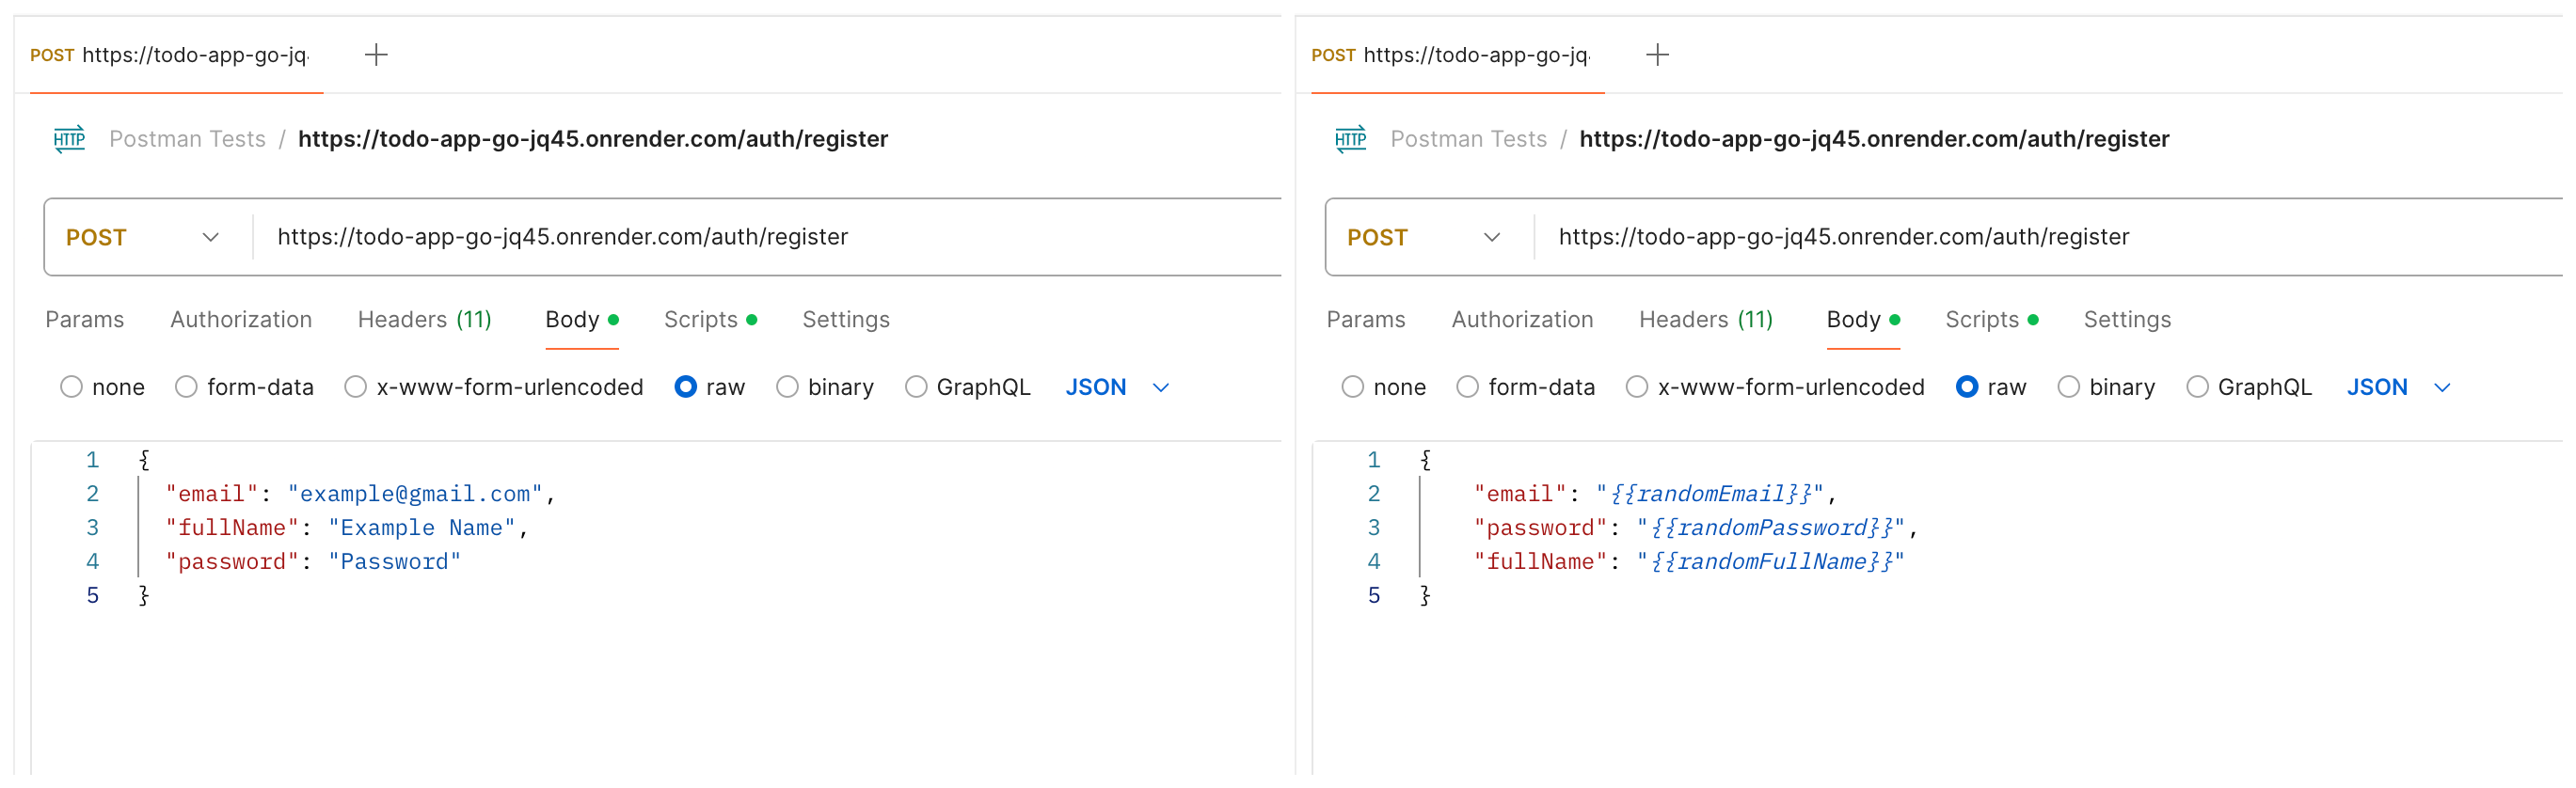 Transform static request bodies (left) into dynamic templates (right) by replacing hardcoded values with variable references. This simple change enables endless test variations without manual editing.
Step 4: Send Your Request
Hit that "Send" button and watch the magic happen! Every time you send the request, your pre-request script will generate new random values, so you'll be creating a unique user each time without having to type anything manually.
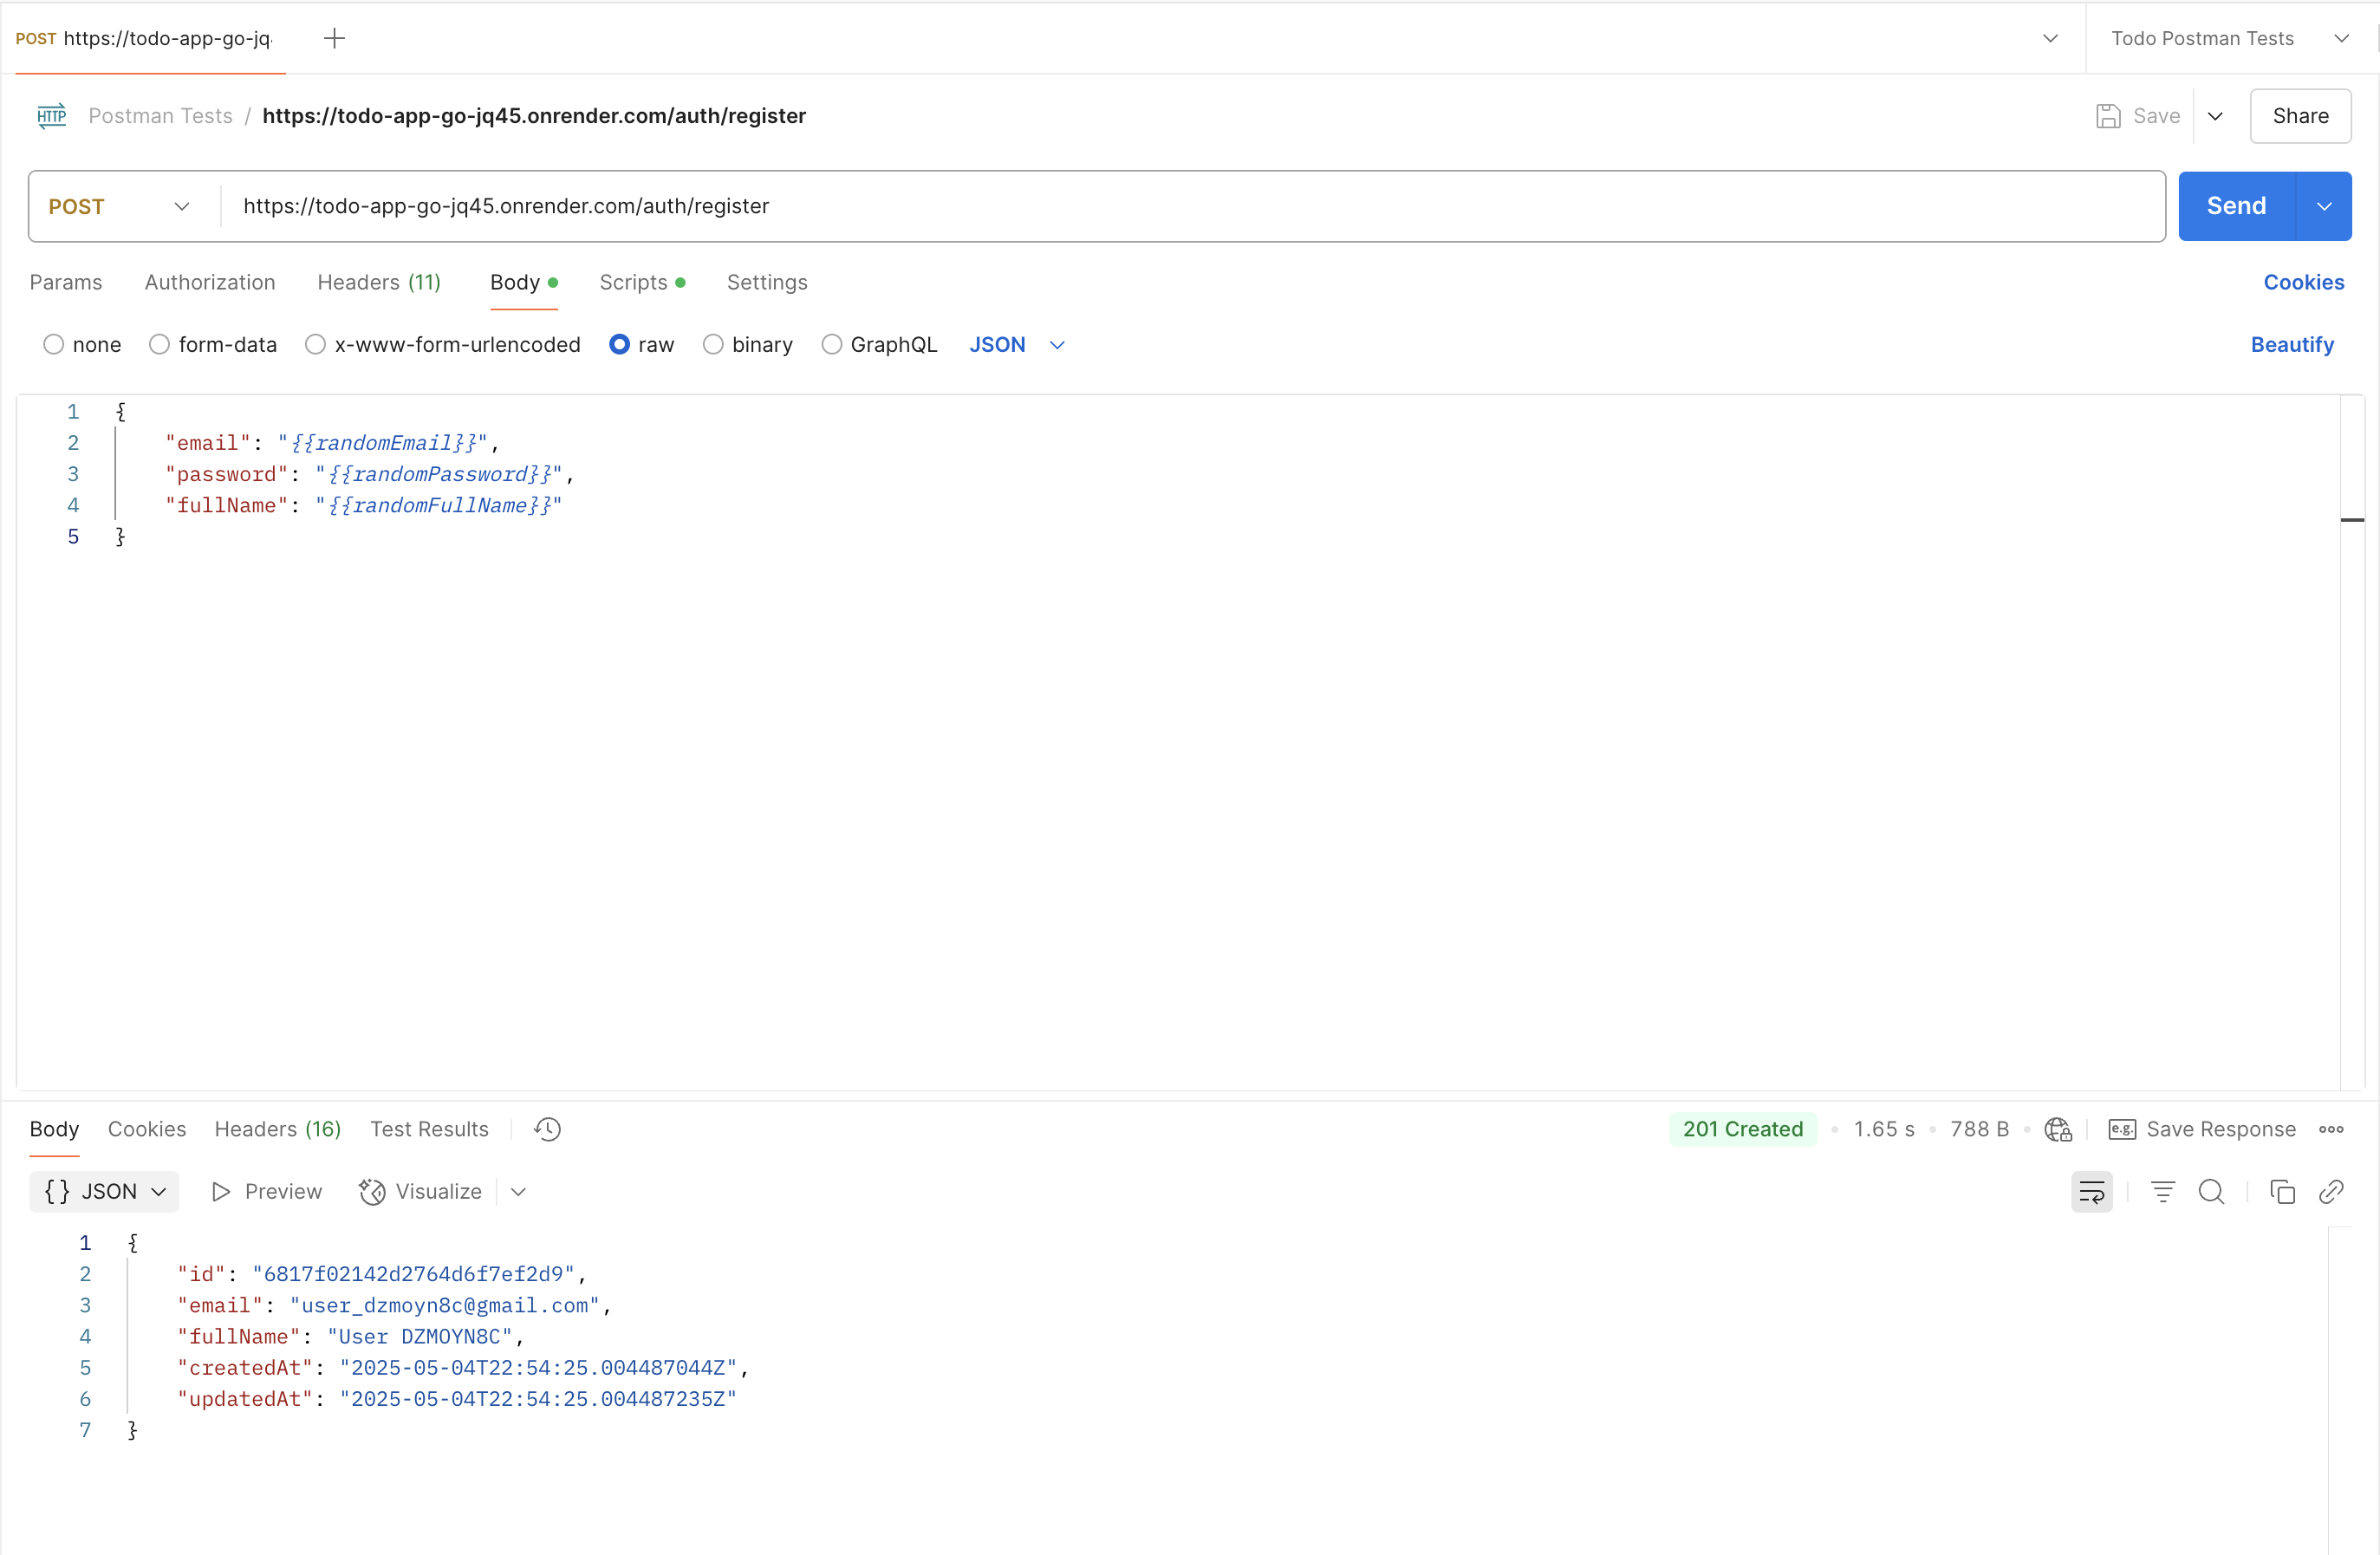 A successful API response confirms your dynamically generated data was accepted by the server. Note how each request creates a unique user with randomized credentials from your pre-request script.
Step 5: Verify Your Results (Optional but Recommended)
Want to make sure everything worked as expected? Add a simple test script to your post-request script:
pm.test('Status code is 200', function () {
pm.response.to.have.status(200);
});
pm.test('Response contains our generated email', function () {
const responseData = pm.response.json();
pm.expect(responseData.email).to.equal(
pm.collectionVariables.get('randomEmail')
);
});An Extra Tips I've Found Useful
Using Your Variables in Multiple Requests
The beauty of saving these variables is that you can use them across multiple requests. For example, after registering a user, you might want to log them in using the same credentials:
{
"email": "{{randomEmail}}",
"password": "{{randomPassword}}"
}Wrapping Up
That's it! With this pre-request script approach, you've created a tool that genuinely serves your testing purpose.
This setup allows you to:
- Focus on critical thinking and test design rather than repetitive data management
- Invest time strategically – automation that pays off by supporting exploratory testing
- Run varied test scenarios without the cognitive overhead of manual data coordination
- Create space for deeper investigation when you discover interesting system behaviors
Remember: The goal isn't "full automation" but thoughtful application of tools that extend your capabilities as a tester. Your context matters, and be ready to adapt this approach as you learn more about your system's behaviors and risks.
What's Next?
Now that you've automated your test data generation:
- Try expanding this approach to other endpoints in your collection
- Create a dedicated environment for your random variables
- Share this technique with your team to improve everyone's workflow
- Challenge yourself to generate even more complex data patterns
Happy testing!